Shopify Hover problem

Over the years of Shopify development, me and my team has dealt with a lot of unique client requirements. Most of the times, these requirements don’t fall in or out of the box it’s just there because everybody is doing it. One of those requirements were of quick view functionality on products.

This quick view enables the user to hover over a product to quickly view the close up of the product or whatever image is placed second on the image carousel.

The description of the functionality sounds easy-peasy but the implementation however is difficult.

Couple of ways you can do it. Here you can set an offset and a limit to specifically grab the 2nd image:

{% for image in product.images offset:1 limit: 1%}
{{ image | img_url: ‘400×400’ | img_tag }}
{% endfor %}
Where 400×400 is, use whatever size you need.

Or a more straightforward approach would be:

{{ product.images[1] | img_url | img_tag }}
product.images gives you an array of all the images for the product, the number inside the brackets refers to the index of the image. Array indexes start with 0, so 1 would be the 2nd image.

If both of the aforementioned methods don’t work, you can try adding the functionality from scratch. Just follow these steps

1.Add CSS to your stylesheet

To add a hover effect, you will need to add some CSS code to your theme’s stylesheet:

From your Shopify admin, go to Online Store > Themes.
Find the theme you want to edit, and then click Actions > Edit code.

In the Assets directory, click theme.css.liquid. If your theme doesn’t have a theme.css.liquid file, then click styles.css.liquid, or another file with a .css.liquid file extension.

At the very bottom of the file, paste this code hosted on GitHub.

Click Save.

2. Edit the code for your product images

To edit the code for your product images:

In the Snippets directory, click product-grid-item.liquid.

If your theme doesn’t have a product-grid-item.liquid file, then look for one of the following:

product-card.liquid
product-card-grid.liquid
product-loop.liquid
Find the HTML img tag for your product images by searching for:

<img

The code for the tag varies theme to theme, but always starts with <img, and ends with either > or />. It might look similar to this:


<img src=”{{ featured.featured_image.src | img_url: ‘450×450’ }}” alt=”{{ featured.featured_image.alt | escape }}”>

On a new line above the img tag, paste the following code:


<div class=”reveal”>

On a new line below the img tag, paste the following code:


</div>

On a new line below the img tag, paste the following code:

The result should look like this:

<div class=”reveal”>

 <img src=”{{ featured.featured_image.src | img_url: ‘450×450’ }}” alt=”{{ featured.featured_image.alt | escape }}”>

</div>

On a new line below the img tag and above the closing

tag, add the code that changes what is shown on hover. The code that you add will vary depending on whether you want to show an alternate product image, custom text, or a combination of the two. Follow the steps for the customization of your choice:

3. Show an alternate product image on hover

On a new line below the img tag and above the closing

tag, paste the following code:

<img class=”hidden” src=”{{ product.images.last | img_url: ‘450×450’ }}” alt=”{{ product.images.last.alt | escape }}” />

Your code should look like this:

<div class=”reveal”>

 <img src=”{{ featured.featured_image.src | img_url: ‘450×450’ }}” alt=”{{ featured.featured_image.alt | escape }}”><!– this is your original image tag –>

 <img class=”hidden” src=”{{ product.images.last | img_url: ‘450×450’ }}” alt=”{{ product.images.last.alt | escape }}” />

</div>

Click Save.

A word of caution
As the Murphy’s law states that ‘Anything that can go wrong will go wrong’. This tutorial is meant for shopify experts with proficiency in web design languages such as HTML, CSS, Javascript and Liquid. So it’s highly recommended that you hire Shopify professionals like us.

We are able to change or customize shopify at any level. if your required above mention customization in your store please contact us or write a email on ecommercewebguru@gmail.com

Add To Cart button doesn’t open Cart Drawer (Brooklyn Theme)

This question has been asked numerous times in the shopify but you didn’t find good answer, so I’ll post again. I’m working in the Brooklyn theme, but this seems to be a recurring issue for a lot of themes.

How can the click action of “Add To Cart” buttons on pages other than the product page (i.e. collection) open the cart drawer rather than jumping to the cart page?

The goal is to allow customers to look at a product grid and quickly and easily add multiple items to the cart. All without navigating to individual product pages.

We are able to change or customize shopify at any level. if your required above mention customization in your store please contact us or write a email on ecommercewebguru@gmail.com
How to add product video instead of product image?

Are looking for help on this. Here some common question comes from our client.

  • Is there a way to have a video show up in the main products slider instead of images?
  • How to add product video instead of product image? (Supply theme)
  • I am struggling trying to add videos to my product pages instead of product images.

Here’s a simple way to set a video as your product image.

1. In your admin – select a product you would like to add a video to.
2. Hover over a product image you would like to add your youtube video to.
3. Select “Edit Alt Text”
4. Paste your Youtube embed link in the dialog box.
5. Save your changes!

I hope that works for you, please let me know!

We are able to change or customize shopify at  any level. if your required any customization in your store please contact us or write a email on ecommercewebguru@gmail.com
 

How to change brooklyn theme slideshow image for mobile device ?

Are you using the brooklyn theme for your shopify store and want to change the image in the mobile? Or Did you facing the some below listed proble with the brooklyn theme.

  • Brooklyn Theme – Hero image doesn’t resize in mobile view.
  • How to change the slideshow height to automatically adjust in mobile view?
  • How to edit the hero slideshow size in brooklyn theme.
  • How to change Brooklyn Theme / Hero sliding image mobile version
  • Brooklyn blurry hero image on device?

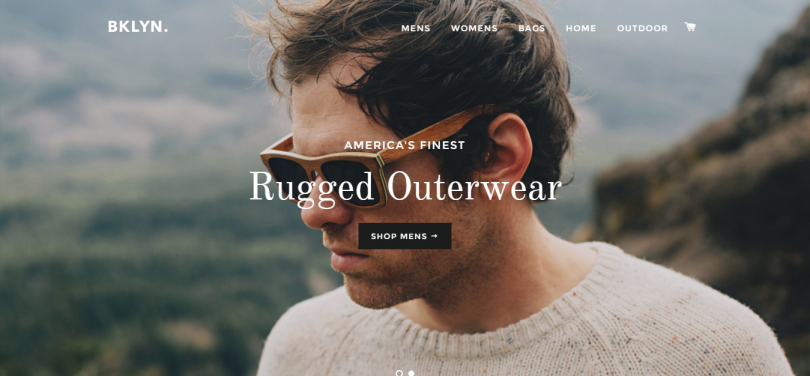
Brooklyn theme is responsive, this cropping is a natural feature of the theme. On mobile or smaller screens for example, the slides here are resized so that their height is the same as the height of your mobile/ device screen.

New images for mobile device

Did you required completely new solution for this. We can add the a new slider or new images for the mobile device. So you have the option to add different different images for the mobile and desktop device.

We are able to change slider or customise it any level. if your required this customization in your store please contact us or write a email on ecommercewebguru@gmail.com
How to configure multiple images as per variants in shopify

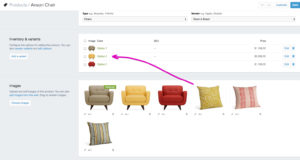
This article will show you how to add multiple variant images to product pages in the Shopify theme. The code may need to be required some adjusted to suit the theme you are working on.

To get started, I have loaded my variant images but now I want to associate additional images with each variant. I only want to display the associated images as thumbnails when the variant option is changed on my product pages.

For example: I only want the yellow chair image, and the yellow pillow image to show as thumbnails when “Option 2” is selected.
sample

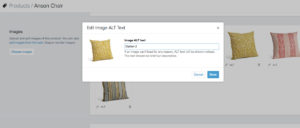
I will be using alt tags to associate the additional images (alt tags don’t need to be applied to the feature images).

Apply the matching variant option title to each of the additional images:

sample2

We will begin our changes in the product.liquid file. Find the code for the image thumbnails, it should look like this:

{% for image in product.images %}
Above this line add:

{% assign featured_alt = product.selected_or_first_available_variant.option1 %}

Just after the for loop add an if statement (featured image should have already been defined above):

{% if image.alt == featured_alt or image == featured_image %}

We then need to add the script from the first file in this gist (the second file is the thumbnail code from the above screenshot). Add the code to to the bottom of the product.liquid template.

This is an example of what the switchImage function from the gist could look like:

var switchImage = function(newImageSrc, newImage, mainImageDomEl) {
jQuery(mainImageDomEl).attr('src', newImageSrc);
$(mainImageDomEl).parents('a').attr('href', newImageSrc);
};

All done now.just enjoy it.

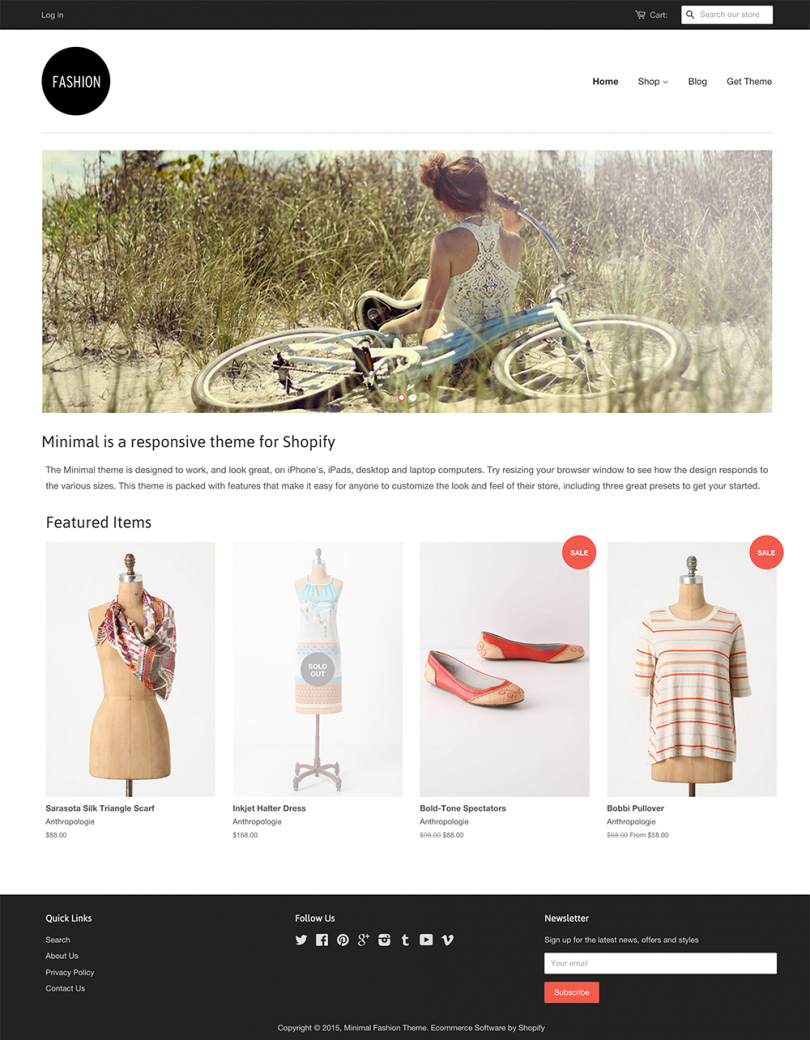
We all know the Minimal theme is one of the best and commonly used theme in shopify store . We are working on lot’s of store based on Minimal theme. Minimal Fashion is a responsive theme specifically designed to adapt its display according to the device in use. It’s packed with great features you can customize according to your brand including the background layout, typography, product and collection views, navigation, colour schemes and images.

Here we list out the common thing which is requested by the store owner for there store.

  • How to add list view in Minimal theme?
  • How to add product pages slider, with arrows right and left at the sides.
  • How to add Multi-Level Menu – Minimal Theme .
  • How to add Full Screen Slider on home page on Minimal Theme.

We are able to change or customize it any level. if your requried any customization in your store please contact us or write a email on ecommercewebguru@gmail.com

We all know the brooklyn theme is one of the best and commonly used theme in shopify store . We are working on lot’s of store based on brooklyn theme. Here we list out the common thing which is demanded by the store owner for there store.

  • How to add image slideshow on product details page.
  • How to Change the height of hero image.
  • How to Center logo and menu for Brookln theme.
  • How to change the product grid on collection page to be four in a row.

We are able to change or customize it any level. if your requried any customization in your store please contact us or write a email on ecommercewebguru@gmail.com
How can we change the product image in to slider on brooklyn theme in shopify ?

Brooklyn is the one of the popular theme and modern responsive theme for your Shopify store. But while looking the product details page many of the store owner want to change the product details page. They want to change the product image in the the better slider option.

We have recently customize this for one of our client. You need to modify the product template for this. and required the jquery customization for this.

If you want to change in your store feel free to contact me at ecommercewebguru@gmail.com and we happy to work for you.

Shopify-vs- Bigcommerce

So, you’ve decided to start an online business. You’ve decided on idea for a product niche, you’ve done some research into the logistics of where you’ll source your products, you’ve done some market research into who the typical buyers are for your products, and you’ve looked at competitive options. With that, all the hard work is done right? Well it might not be. You still have to build your website.

s-v-b

We’ve been through this decision making process many times when we first started out, so we can relate to it.

Instead of going through micro features of each e-commerce builder, or giving you a bunch of checks and crosses in a table, we’ve laid out below our thought process on how we decide which builder to pick, and what we view as important to you.

At the end of the day, we still encourage you to browse through Shopify and Bigcommerce’s sites carefully, and sign up to their free trials to see for yourself what they offer. You have to get your hands dirty and invest a few hours with each of them to know which one fits you better especially if you are serious about your business – there really isn’t any other way.

So let’s get going on what we view as important things to consider in this Bigcommerce vs Shopify review. In our view, the following 7 features (plus conclusion) are some of the most important considerations when we evaluate an e-commerce builder:

Customizing your Shopify theme

Shopify themes from Out of the Sandbox already come packed with tons of great features that are easy to configure using the built-in configuration panel — but there comes a time in many online stores’ lives when a more advanced customization is needed.shopify-theme-customization
Of course, these types of customizations aren’t for the faint at heart — they do require knowledge of HTML and CSS as well as Shopify’s templating language, Liquid.

A custom stylesheet

 
One of the simplest ways to make adjustments is via CSS. This is probably the least destructive method as well. These types of changes are best if you need to adjust the color, font, size, spacing or placement of elements that aren’t controllable by the theme’s options panel.

CONTACT US